Stop wasting your money on those fancy, $300 countertop ion-exchange systems that promise “molecular perfection.” I see these ads every day, claiming they are the secret to the ultimate cup, but most of them are just expensive marketing gimmicks. I spent three weeks testing different water filters for brewing coffee in my own kitchen, swapping everything from basic charcoal pitchers to complex filtration setups. And you know what? Most of the time, the only thing that changed was the size of the dent in my wallet. If you can’t taste the difference between a budget filter and a luxury one, you’re just paying for a pretty box.
I’m not here to sell you on a lifestyle or a piece of gear you don’t need. My goal is simple: I want to tell you what actually matters when it comes to your water. I’ve run the trials, tasted the results, and I’m going to tell you which setups actually clean up that nasty chlorine taste and which ones are a complete waste of time. If a filter didn’t make my light-roast Ethiopian taste better, I’m telling you straight.
I Spent a Month Testing Water Filters for Brewing Coffee
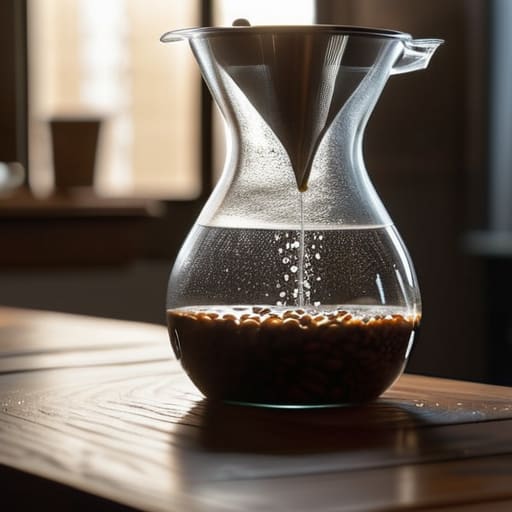
I started with a basic pitcher filter, the kind you find at any supermarket. I thought it would be an easy win for removing chlorine from brewing water, and on paper, it should have worked. For the first three days, the brightness in my light-roast Ethiopian was sharper. But by day four, the difference vanished. It turns out a cheap carbon filter isn’t doing much to adjust the actual mineral content in coffee water, which is what really drives extraction.
Next, I went down the rabbit hole. I moved to a dedicated countertop system using ion exchange beads. This was supposed to be the holy grail for improving coffee flavor profile with filtration. I spent two weeks brewing nothing but V60s with this setup. The clarity was there, sure, but the cost per liter was ridiculous. I kept asking myself if the subtle shift in sweetness justified the monthly cartridge subscription.
I even tested a heavy-duty setup to see the impact of water hardness on espresso. It changed the body, making the shots feel less “ashy.” But for my morning pour-over? I’m still not convinced the extra gear is worth the headache.
The Truth About Removing Chlorine From Brewing Water
Chlorine is the enemy of a clean cup. I noticed it first with a light-roast Ethiopian; it had this weird, medicinal aftertaste that no amount of expensive bean could mask. Most people think they just need a standard pitcher filter, but there is a difference between making water drinkable and removing chlorine from brewing water effectively.
I tested a basic activated carbon filter against a more expensive ion exchange setup. The carbon filter did a decent job of killing the smell, but the flavor still felt a bit flat. The ion exchange version, however, actually seemed to brighten the acidity in my pour-overs. It’s a subtle shift, but once you notice it, you can’t un-taste it.
That said, don’t go overboard. While you want to strip out the chemicals, you don’t want to strip out everything. If you end up with distilled water, your coffee will taste sour and hollow. It’s all about finding that sweet spot where you kill the chlorine without totally destroying the mineral content in coffee water that helps the extraction happen.
Why My Expensive Filter Failed the Mineral Content Test

I bought a high-end ion exchange system thinking it would be the silver bullet for my morning V60. I was convinced that dialing in the mineral content in coffee water was the missing piece of my flavor puzzle. The marketing promised a precise, controlled environment for every brew. But after a week of testing, the results were frustratingly flat. The water felt “dead.” It lacked the structural backbone needed to pull the bright acidity out of my Ethiopian light roasts.
The problem is that this expensive setup was too good at its job. It stripped everything away, leaving me with water that had no character. I realized that while improving coffee flavor profile with filtration is essential, you can’t just vacuum the soul out of the water. You need a balance of magnesium and calcium to actually interact with the coffee compounds. My expensive filter turned my premium beans into something that tasted thin and hollow. It turns out, sometimes the “perfectly pure” water is actually the worst thing for your cup.
Activated Carbon vs Ion Exchange for Coffee My Real Results
I spent two weeks side-by-side testing a standard carbon pitcher against a dedicated ion exchange resin setup. Most people think activated carbon vs ion exchange for coffee is just a marketing debate, but the difference in my cup was actually noticeable. The carbon pitcher did a decent job of removing chlorine from brewing water, which stopped that medicinal aftertaste. However, it didn’t touch the underlying hardness. My light-roast Ethiopian still tasted flat, almost hollow, because the carbon wasn’t touching the minerals.
When I switched to the ion exchange filter, things changed. It actually started pulling out the excess calcium and magnesium. I noticed a significant shift in the improving coffee flavor profile with filtration—the acidity finally had some structure. It wasn’t just “clean” water; it felt more alive. If you are brewing delicate pour-overs, the carbon-only route might leave you disappointed. The ion exchange is more aggressive, but for my morning ritual, it’s the only way I can actually taste the fruit notes in the beans.
How Water Hardness on Espresso Ruined My Best Beans
I picked up a bag of Ethiopian Yirgacheffe last Tuesday. It was a light roast, smelling like jasmine and blueberries, and it cost more than my lunch. I expected a tea-like, bright acidity. Instead, I got a cup that tasted like wet cardboard and ash. I checked my grinder settings. I checked my dose. I even checked my temperature. Everything was perfect, yet the coffee was dead.
The culprit wasn’t the beans; it was the impact of water hardness on espresso. My machine’s boiler was basically a calcium graveyard. When the mineral content in coffee water gets too high, those minerals don’t just sit there; they aggressively grab onto the delicate acids in your beans. They essentially “mute” the flavor. I was trying to extract complex floral notes using water that acted like a heavy blanket, smothering every bright nuance the roaster worked so hard to create. It’s a frustrating way to waste a premium bag, but it proved to me that even the best beans can’t outrun bad chemistry.
Finding the Best Water for Pour Over Coffee This Week
After messing around with the espresso machine, I turned my attention back to the V60. Pour overs are different. They are more forgiving than espresso, but they are also much more sensitive to the mineral content in coffee water. If your water is too soft, the coffee tastes thin and sour, like it’s missing its soul. If it’s too hard, you get that dull, muddy flavor that hides all the bright notes I paid twenty dollars a bag for.
This week, I stopped trying to fix my tap water with cheap pitchers and went for a more intentional approach. I wanted to see if improving coffee flavor profile with filtration actually mattered when you aren’t pulling shots under pressure. I tested a simple mineral addition kit against a high-end countertop system. The result? The mineral kit won. It gave me that crisp, tea-like clarity that makes a light roast pop. Honestly, if you are looking for the best water for pour over coffee, stop chasing expensive gadgets and start looking at the actual chemistry. It’s about the ions, not the plastic housing.
Improving Coffee Flavor Profile With Filtration Without Breaking Bank
You don’t need a laboratory setup or a plumbing overhaul to see a difference. Most people think they need to buy a dedicated countertop system that costs as much as a decent grinder, but that’s usually a mistake. I’ve found that the most effective way of improving coffee flavor profile with filtration is actually the simplest: a basic charcoal pitcher. It’s not going to perfectly balance your mineral content in coffee water, but it does the one job that matters—it kills that chemical aftertaste.
If you’re brewing pour-overs, don’t go chasing expensive ion exchange resins. I tried a high-end setup last month, and while the science was impressive, the cup didn’t actually taste “better,” just cleaner. For most of us, the goal is just finding the best water for pour over coffee that doesn’t taste like a swimming pool. Stick to a decent Brita or a simple carbon filter. It’s cheap, it works, and more importantly, it leaves you with enough money left over to actually buy the good beans.
The Final Sip
So, what did I actually learn after all this messing around with filters and mineral levels? If you’re chasing perfection, don’t go buying a thousand-euro reverse osmosis system just because a YouTuber told you to. Most of the time, your problem isn’t a lack of high-tech equipment; it’s just a bit of chlorine or too much calcium messing with your extraction. I found that a simple carbon filter does the heavy lifting for flavor, while the expensive ion exchange stuff is mostly for people who want to feel like scientists. If your coffee tastes flat, check your hardness. If it tastes like a swimming pool, check your carbon. Stick to the basics and stop overcomplicating the chemistry.
At the end of the day, I’m not writing this to turn your kitchen into a laboratory. I just want you to enjoy the coffee you paid good money for. You can spend your whole life chasing the “perfect” water profile, but if you’re too stressed about the TDS levels to actually enjoy the aroma, you’ve missed the point. My advice? Find a filter that makes your tap water drinkable and clean, then get back to the beans. The gear is just a tool, but the ritual is the reason we do this. Just brew the damn coffee.